
Posted: April 11, 2017
As the old saying goes, April showers bring May flowers. We hope that these spring crafts brighten up you and your loved one’s day. Listed below we have two different crafts that you can do with your child. One is an umbrella suncatcher and the other is a handprint butterfly. Each activity has two different versions, an entry version and a more advanced version. Look through the crafts to find one that best suits you and your child.
Umbrella Suncatcher
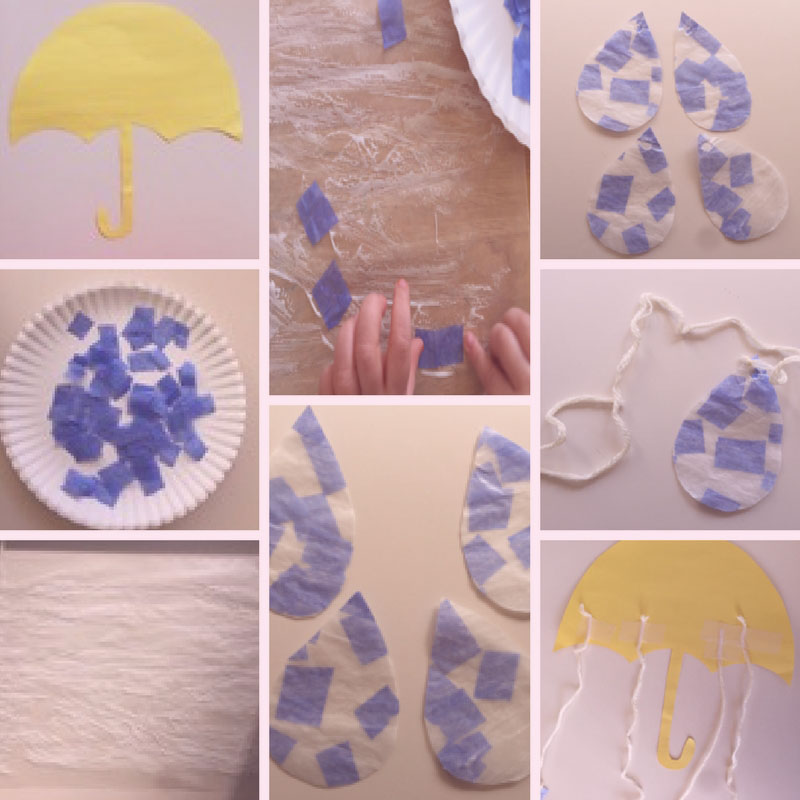
Entry Version:
Materials:
- Wax paper
- Blue tissue paper
- Yellow paper
- White paper
- Glue
- String
- Hole puncher
- Scissors
- Pencil
- Tape
- Paint brush
- Various paint colors
Step 1:
Draw an umbrella on the yellow paper and cut it out. It should be large enough to hang the raindrops on.
Step 2:
Cut little squares out of the blue tissue paper.
Step 3:
Lay the wax paper out flat.
Step 4:
Drizzle glue onto the wax paper.
Step 5:
If possible, let the child smear around the glue on the wax paper. If not, spread the glue around yourself.
Step 6:
Allow the child to place the blue square tissue paper onto the wax paper.
Step 7:
Fold the wax paper in half.
Step 8:
After the wax paper dries, cut rain drops out of it.
Step 9:
Using the hole puncher, punch a hole in the tip of the raindrops.
Step 10:
Cut the string to an appropriate length and tie one end around the rain drop. Do this for all the rain drops.
Step 11:
Tape the other end of the string to the backside of the umbrella. Repeat this for all the rain drops.
Step 12:
Tape the umbrella to a window and enjoy!
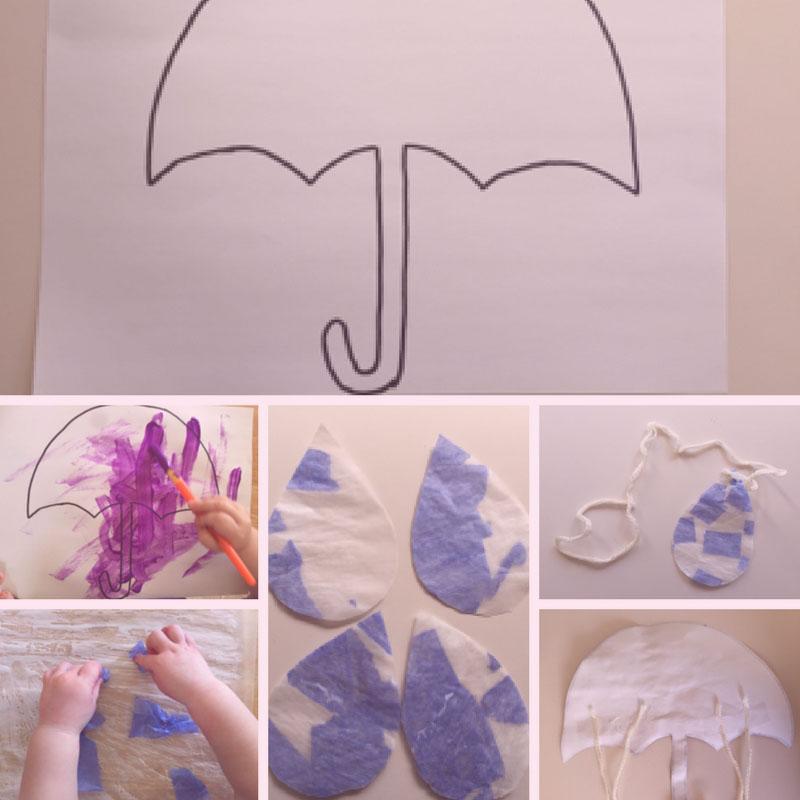
Advanced Version

Materials:
- Wax paper
- Blue tissue paper
- White paper
- Glue
- String
- Hole puncher
- Scissors
- Pencil
- Tape
- Paint brush
- Various paint colors
Step 1:
Draw an umbrella on the white paper. It should be large enough to hang the raindrops on.
Step 2:
Let the child paint the umbrella with their color of choice. After it dries, cut it out.
Step 3:
Lay the wax paper out flat.
Step 4:
Drizzle glue onto the wax paper.
Step 5:
Let the child smear the glue around with a paintbrush.
Tip: Hold the wax paper in place as the child smears the glue.
Step 6:
Allow the child to rip pieces of the blue tissue paper and place onto the wax paper.
Step 7:
Fold the wax paper in half.
Step 8:
After the wax paper dries, cut rain drops out of it.
Step 9:
Using the hole puncher, punch a hole in the tip of the raindrops.
Step 10:
Cut the string to an appropriate length and tie one end around the rain drop. Do this for all the rain drops.
Step 11:
Tape the other end of the string to the backside of the umbrella. Repeat this for all the rain drops.
Step 12:
Tape the umbrella to a window and enjoy!
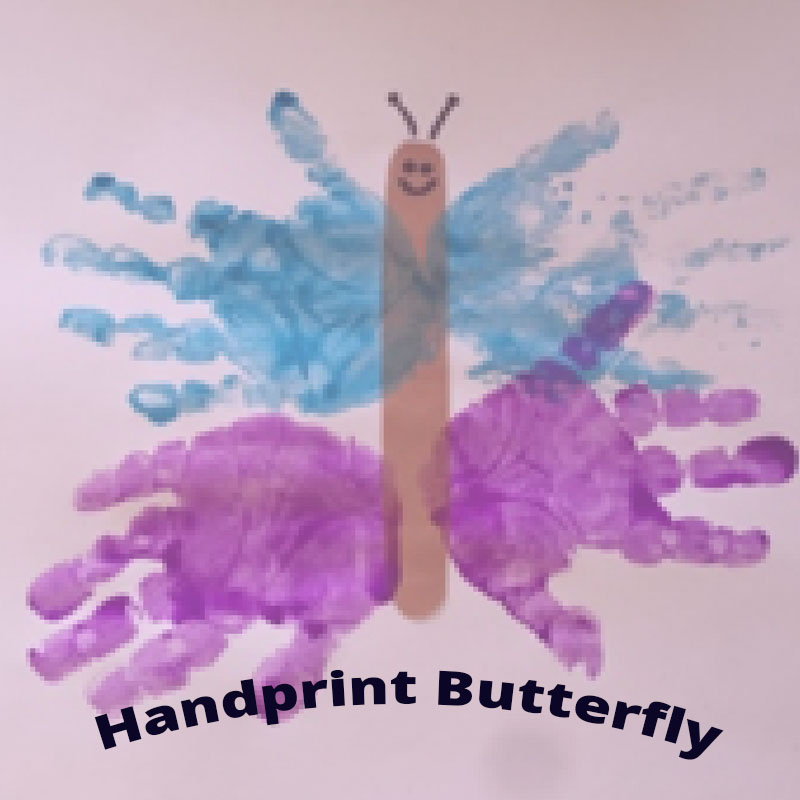
Handprint Butterfly
Entry version:
Materials:
- White paper
- Brown paper
- Assorted paints
- Paint brushes
- Black marker
- Scissors
- Glue
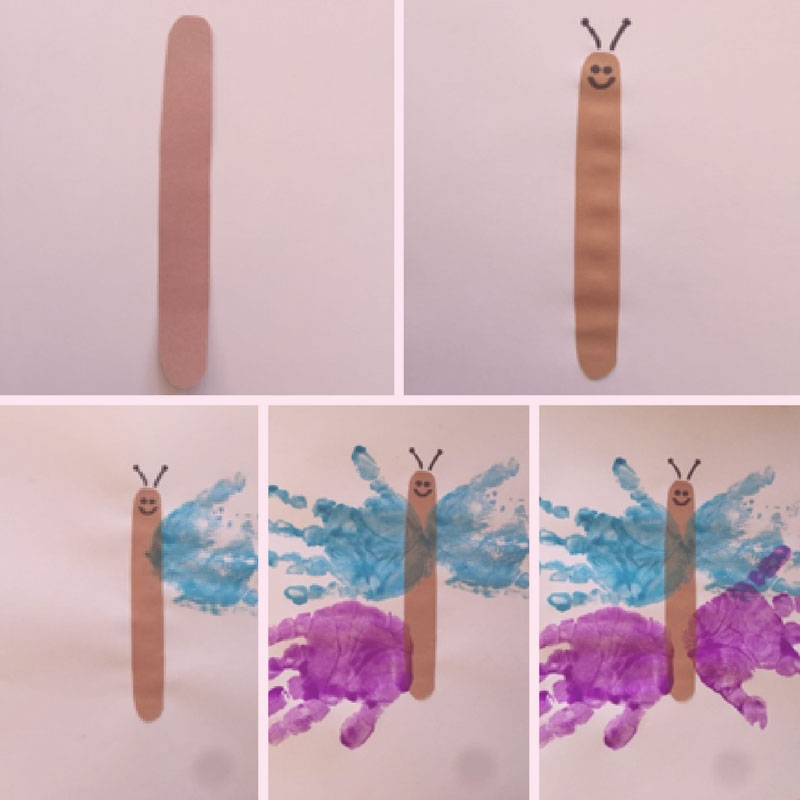
Step 1:
Cut an elongated oval out of the brown paper
Step 2:
On one end, draw two eyes and a smile with the black marker.
Step 3:
Glue onto the center of the white paper.
Step 4:
Draw two antennas coming out of the top of the butterfly's head.
Step 5:
Paint the child's right hand with one of the paint colors. The child can pick out the color they would like to use.
Step 6:
Press the child's hand onto the white paper. The palm of the hand should be touching the butterfly's body and the thumb should be pointed up.
Step 7:
Paint the child's left hand with the same color as before.
Step 8:
Press the child's hand onto the white paper. The palm of the hand should be touching the butterfly's body and the thumb should be pointed up. This should be done on the opposite side of butterfly's body from the last handprint.
Step 9:
Paint the child's right hand with a different color paint.
Step 10:
Press the child's hand onto the white paper. The palm of the hand should be touching the butterfly's body and the thumb should be pointed down. This handprint should be underneath the second handprint we did (step 8).
Step 11:
Paint the child's left hand with the same color used in step 9.
Step 12:
Press the child's hand onto the white paper. The palm of the hand should be touching the butterfly's body and the thumb should be pointed down. This handprint should be underneath the first handprint we did (step 6).
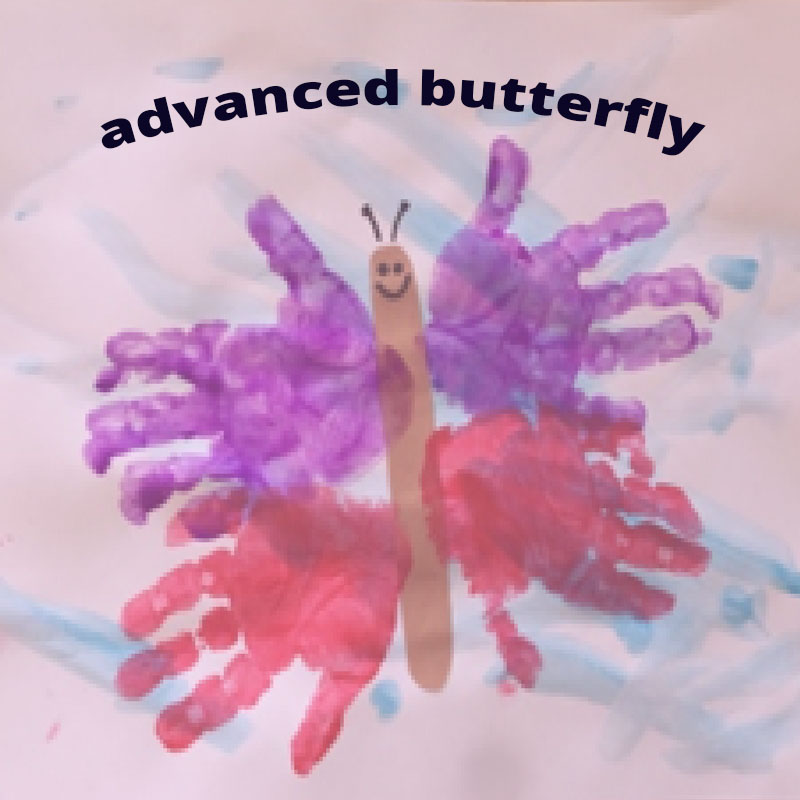
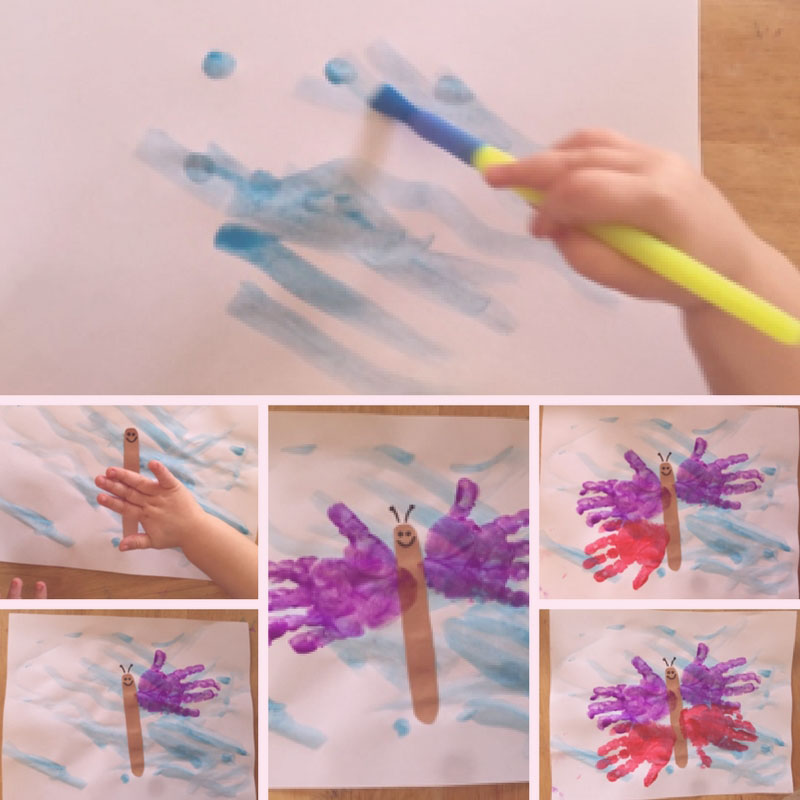
Advanced version
Materials:
- White paper
- Brown paper
- Assorted paints - including blue
- Paint brushes
- Black marker
- Scissors
- Glue
Step 1:
Cut an elongated oval out of the brown paper.
Step 2:
On one end, draw two eyes and a smile with the black marker.
Step 3:
Put some blue paint in a cup and add a couple drops of water. Mix with a paint brush.
Step 4:
Allow the child to use the blue water paint to paint the white piece of paper. Give time for the paper to dry after.
Step 5:
Drizzle glue on the back of the butterfly’s body.
Step 6:
Allow the child to place and press the butterfly’s body onto the blue painted paper.
Step 7:
With the black marker, draw two antennas on the top of the butterfly's head.
Step 8:
Paint the child's right hand with one of the paint colors. Your child can pick out the color they would like to use.
Step 9:
Press the child's hand onto the white paper. The palm of the hand should be touching the butterfly's body and the thumb should be pointed up.
Step 10:
Paint the child's left hand with the same color as before.
Step 11:
Press the child's hand onto the white paper. The palm of the hand should be touching the butterfly's body and the thumb should be pointed up. This should be done on the opposite side of butterfly's body from the last handprint.
Step 12:
Paint the child's right hand with a different color paint.
Step 13:
Press the child's hand onto the white paper. The palm of the hand should be touching the butterfly's body and the thumb should be pointed down. This handprint should be underneath the second handprint we did (step 11).
Step 14:
Paint the child's left hand with the same color used in step 12.
Step 15:
Press the child's hand onto the white paper. The palm of the hand should be touching the butterfly's body and the thumb should be pointed down. This handprint should be underneath the first handprint we did (step 9).